
WHAT IS THE SECURE BOOT?
Secure Boot or secure boot is a mode that Windows brings, and that prevents the execution of any unsigned or certified software at system startup. This is intended to prevent malware or unreliable applications from loading when you start your computer.
However, sometimes it is necessary to disable it to install certain hardware drivers, run older operating systems, or boot from USB devices.
VERIFY IF SECURE BOOT IS DESACTIVATED
Follow these steps to check if Secure Boot is enabled or disabled on your PC:
-
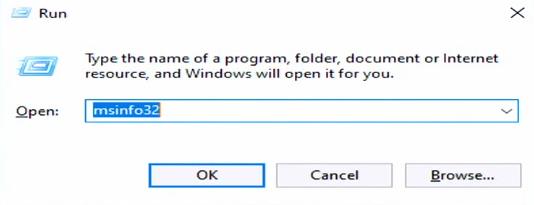
Press the key combination: Windows + R

-
A pop-up window will open in which to write: msinfo32 and click OK.
-
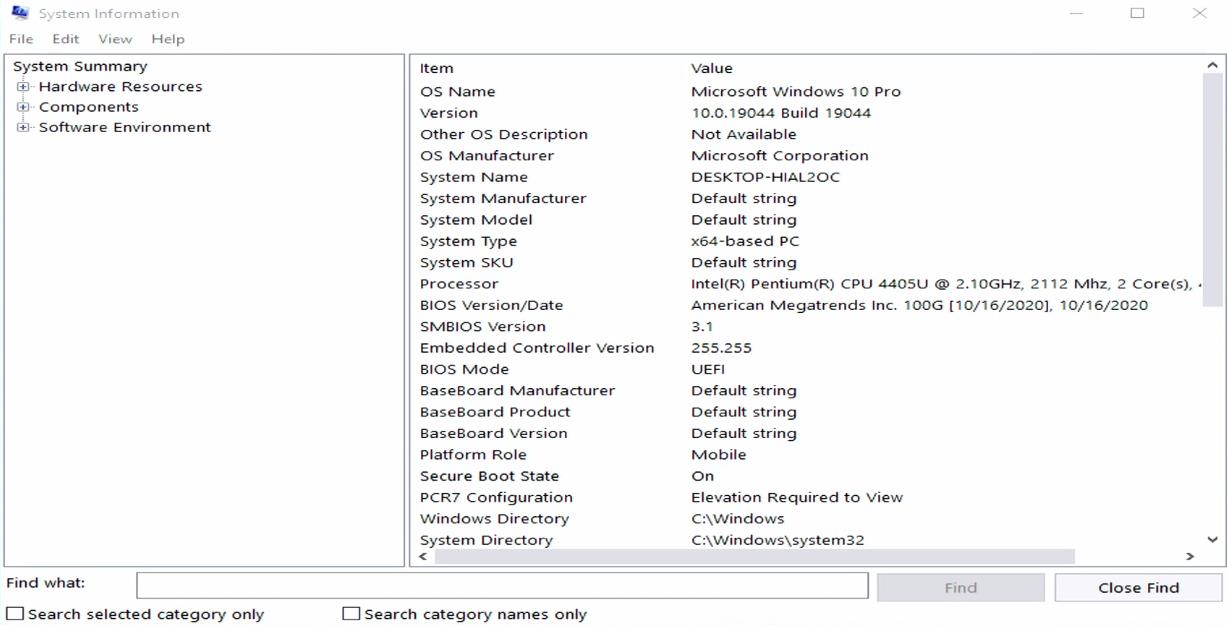
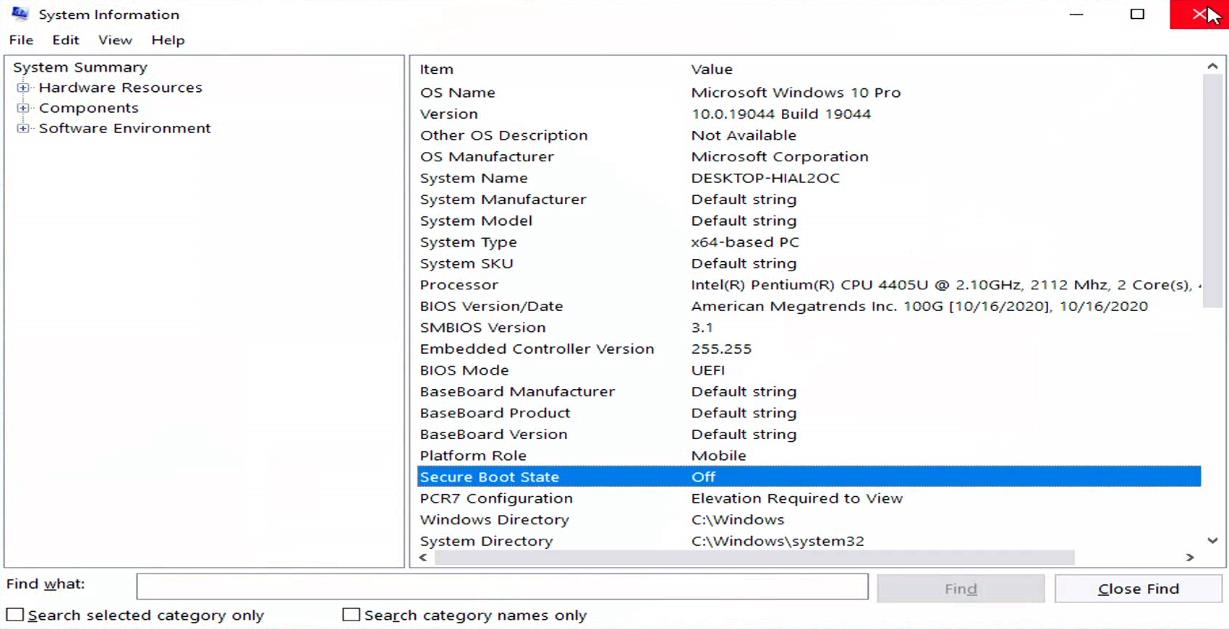
A Windows information window will open, in which you can verify if the secure boot is enabled or disabled.
STEPS TO DISABLE SECURE BOOT
-
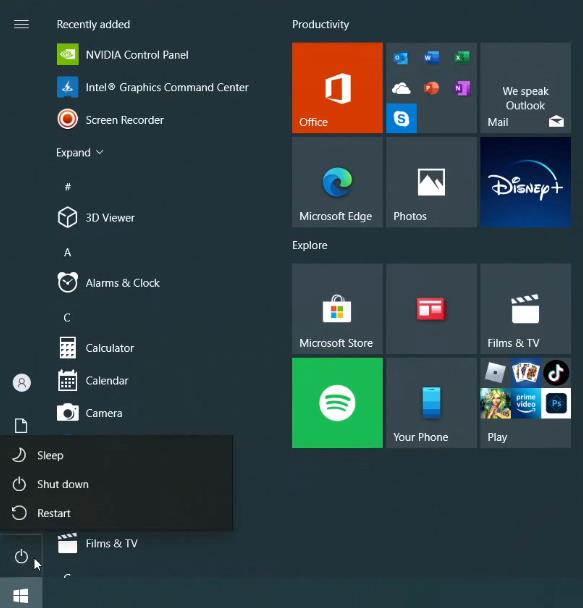
Click on start, and restart the PC.
-
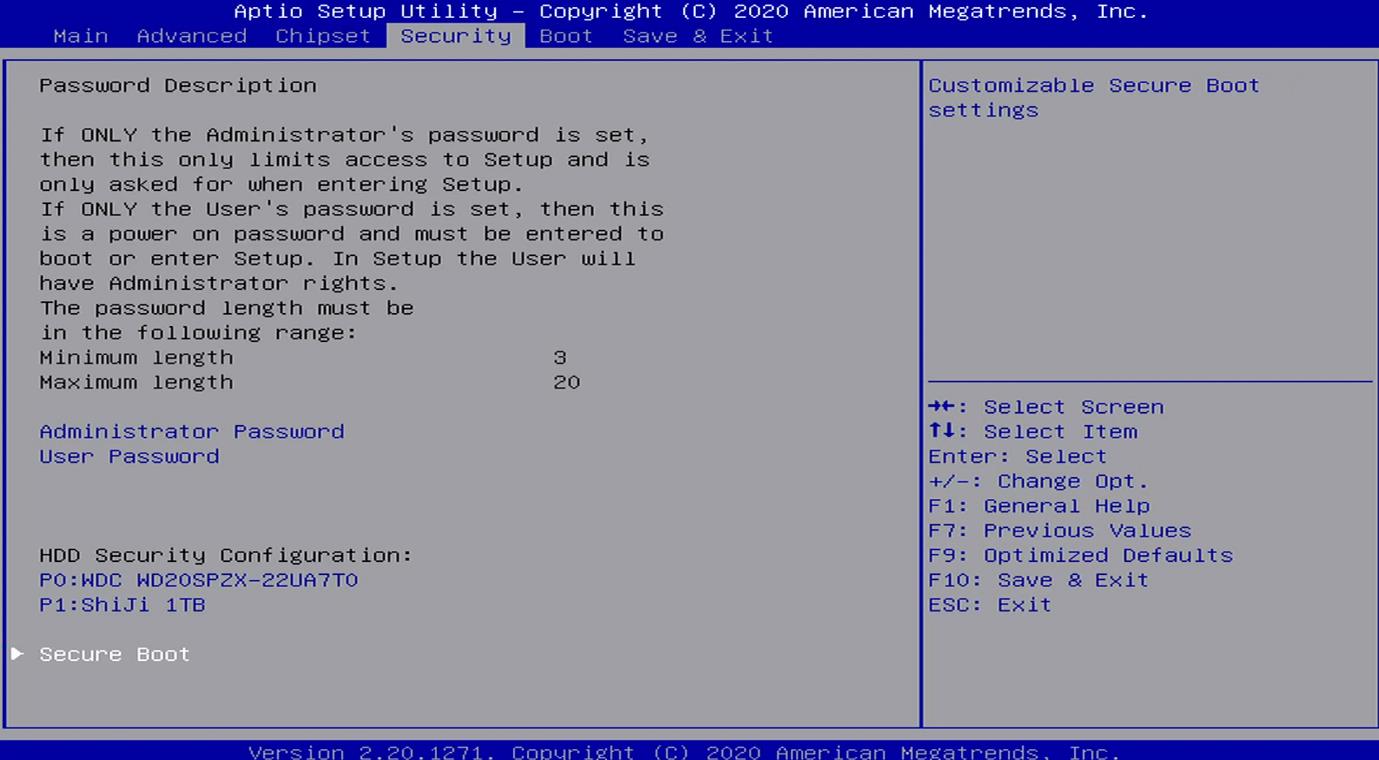
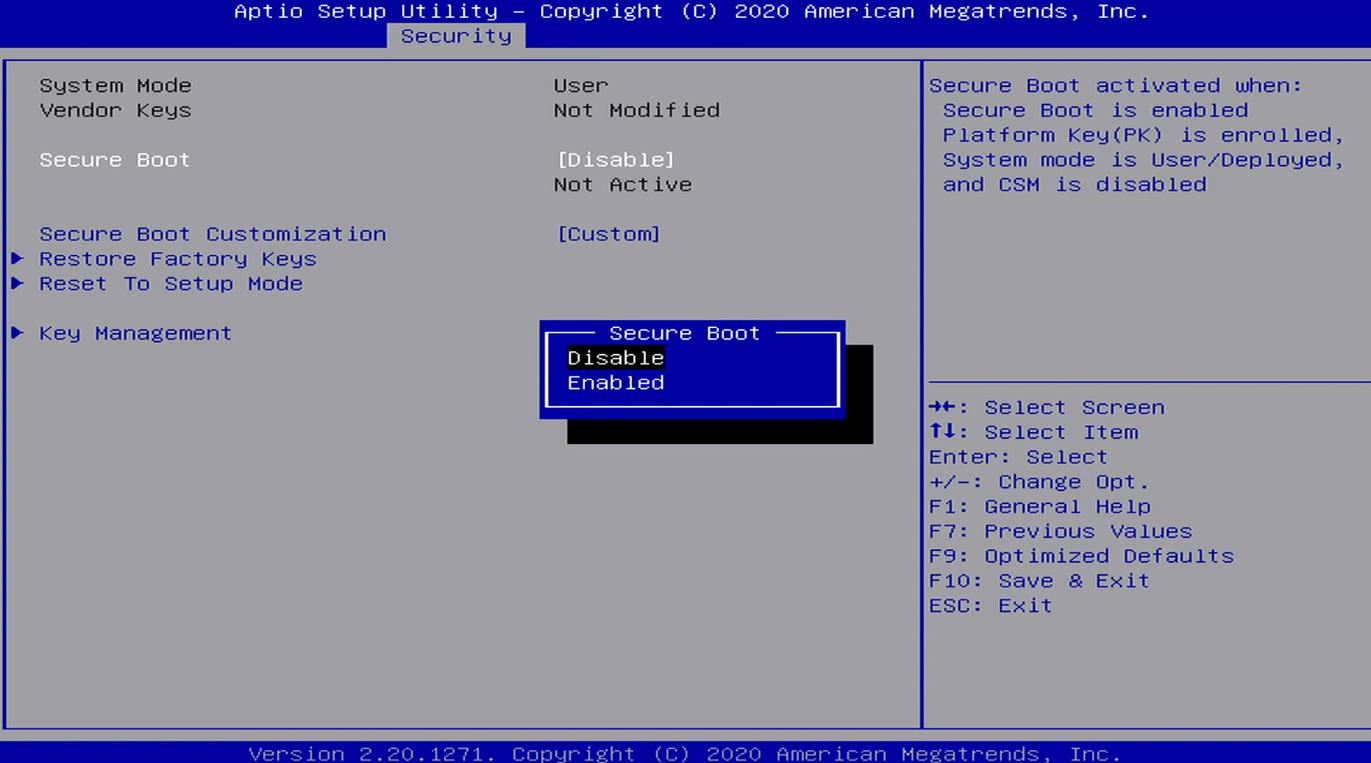
Configure the PC to disable the secure boot. For this we need to enter the BIOS (depending on the brand of the PC, press the keyboard: Acer: F2, Asus: Esc or F2, Compaq: F10, Dell: F2, HP: F10, Lenovo: F1 or F2, Toshiba: F1 or Esc). Once in the BIOS, go to the Security section and select Secure Boot.
-
Here select Disable.
-
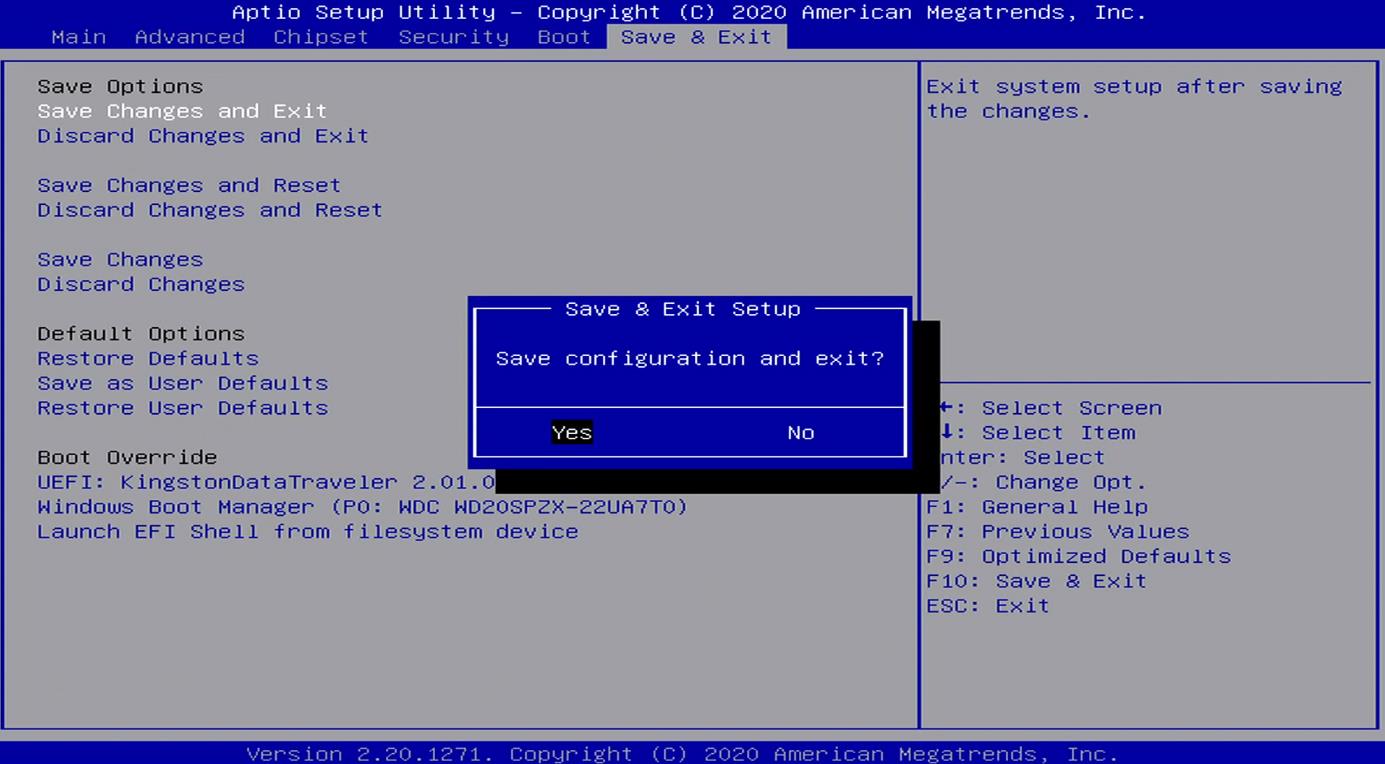
Go to the Save & Exit section, select Save Changes and Exit and click on Yes. The PC will automatically restart, it may take a few minutes.
-
Once the reboot is finished, verify if everything exited correctly. Press Windows + R, and write msinfo32. You will see that the secure boot was disabled.